我的帐户 - 开发者

用户可以在其开发者设置中注册和管理应用程序、应用商店条目和 API 密钥。
本页面的步骤仅适用于个人用户。Company、Classroom 和 Enterprise 管理员应遵循此处的步骤:Company/Classroom/Enterprise 设置:开发者。
在 Company/Classroom/Enterprise 设置中创建的所有应用程序均计入公司的 API 限制。在开发者门户中创建的所有应用程序均计入个人用户的 API 限制。
所有提交到 Onshape 应用商店(Onshape 应用)的应用程序都必须遵循 API 指南:OAuth2 页面上的说明,并使用 OAuth2 进行授权。自动脚本(或不适用于 Onshape 应用商店的应用程序)可能会使用 OAuth2 或 API 密钥进行认证。OAuth2 允许应用程序代表用户调用 Onshape API;API 密钥只能代表生成 API 密钥的 Onshape 用户执行操作。
有关使用 Onshape 开发应用程序的更多信息,请参见以下资源:
* Onshape 开发者文档
* Glassworks API 资源管理器
* 示例代码
若要在 Onshape 中导航到您的开发者设置,请单击您位于 Onshape 窗口的右上角的帐户用户图标 ( )。这将打开一个下拉菜单。单击“我的帐户”。
在页面左侧的列表中单击“开发者”:
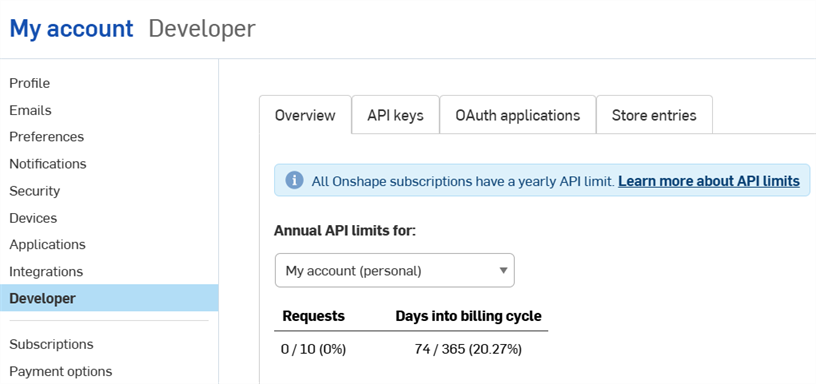
在此页面上,您可以:
-
在 Onshape 注册新的 OAuth 应用程序
-
将经过正确身份验证的应用提交到 Onshape 应用商店
-
查看、创建和删除供个人使用的 API 密钥
-
查看您的 API 使用情况
- 请参见“API 限制”了解有关 API 使用的更多信息。
- 单击“年度 API 限制”下拉菜单以选择其他帐户。
-
通知电子邮件按使用量的 25%、50%、75% 和 100% 发送给所有管理员。
 管理 API 密钥
API 密钥是创建供个人使用的小型应用程序的有用方法,可让开发者避免 OAuth 工作流程的开销。
API 密钥用于对应用程序进行身份验证,而不是对用户进行身份验证。(OAuth2 通过确保用户有权访问 Onshape 来对应用程序和应用程序用户进行身份验证。)
创建 API 密钥后,它仅在创建 API 密钥的堆栈中有效。在您的公司堆栈(即 companyName.onshape.com)上创建的 API 密钥无法在生产堆栈(cad.onshape.com)上运行。管理员还可以管理公司内用户的 API 密钥:参见公司/教室/企业设置 - 开发者。
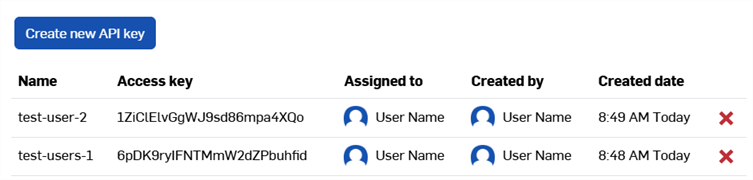
个人帐户的 API 密钥上限为两个 (2)。可根据需要删除 API 密钥。公司、教室和企业帐户没有上限。
查看 API 密钥
- 单击“开发者”页面上的 API 密钥。
- 查看您之前创建的所有 API 密钥。
创建 API 密钥
- 点击创建新的 API 密钥。
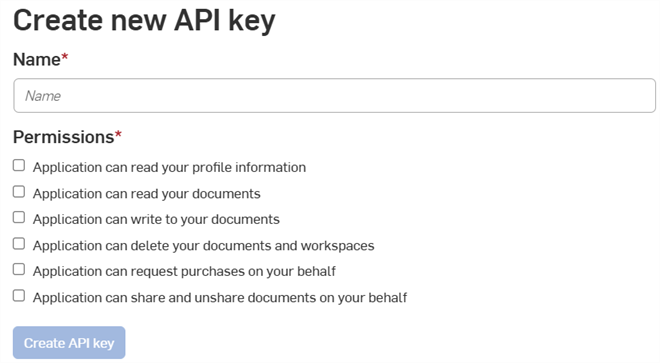
- 在“名称”字段中提供 API 密钥的名称。
- 选择密钥的权限。请参阅下面的权限范围。
- (Optional) To choose an expiration date for the API key:
- Toggle on the Enable TTL (Time to live) button.
- Enter or select a date in the date field. You will receive an email notification when the key is about to expire.
- 单击“创建 API 密钥”按钮。
-
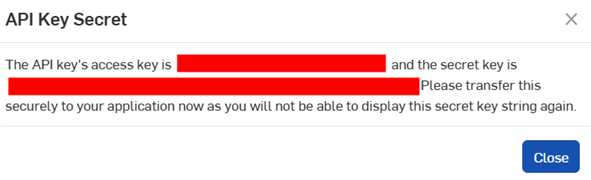
在弹出窗口中,复制显示的 API 密钥和密钥,将其保存在某个地方,然后单击“关闭”按钮。
您将无法再次找到密钥,因此请将其保存在安全的地方!
删除 API 密钥
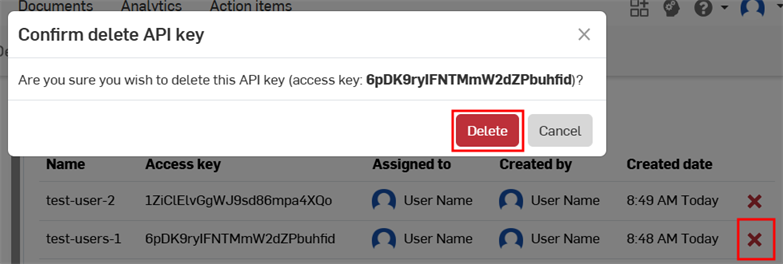
- 点击您要删除的 API 密钥右侧的 “X” 图标。
- 确认您要为所有用户删除此 API 密钥。此操作无法撤消。单击“删除”进行确认。
Moving API keys
API keys cannot be moved between accounts, nor can they be moved from the user level to the company level or vice versa.
If you created an API key on the wrong account:
-
Create a new API key for the correct account:
-
To create an API key at the user level, see Creating API Keys on this page..
-
To create an API key at the company, classroom, or enterprise level, see the Company Settings - Developer docs..
-
-
Replace all references to the original API key throughout your code, and verify the code works as expected.
-
Delete the original API key.
管理 OAuth 应用程序
创建和注册 OAuth 应用程序
-
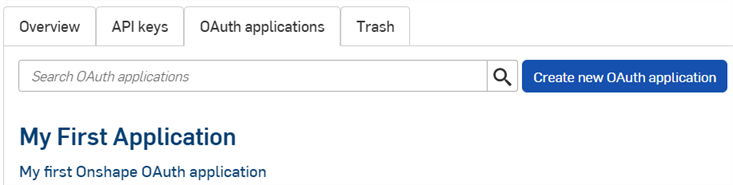
单击开发者页面上的“OAuth 应用程序”页签可查看您的所有应用列表:
-
单击“创建新的 OAuth 应用程序”按钮。
-
填写表单:
-
名称 - 向用户显示的应用程序的名称。
-
主要格式——用于唯一标识您的应用程序的字符串,同时也是该应用程序可能在 Onshape 服务器上存储数据的标记(例如 com.example.example)。应用程序注册后无法更改。不向用户显示。
-
摘要——应用程序的描述,当用户被询问是否授予该应用程序访问其数据的权限时,会向用户显示此描述。
-
重定向 URL——身份验证后重定向到的 URL;即您的应用程序的登录页面。
- 您的应用程序必须至少指定一个在 OAuth 协议交换中使用的 URL。
-
此 URL 还必须使用 SSL(以 https 开头的 URL),但有两个例外情况适用于已安装的桌面应用程序:http://localhost:<port> 和 urn:ietf:wg:oauth:2.0:oob。
-
类型——应用程序类型:集成云应用、已连接云应用或已连接桌面应用。
-
OAuth URL——用于启动 OAuth2 流程以验证用户身份的 URL。请参见“开发者文档:OAuth2”了解详细信息。
-
应包含您已部署应用程序的 URL。
-
这是从 Onshape 应用程序页面调用的第一个 URL。
-
此 URL 托管的页面应处理 OAuth 身份验证。一旦您的应用程序服务器代表用户通过了身份验证,该用户应被重定向到您的应用程序内容。
-
如果您尚未部署应用,可以先将此输入框留空用于本地工作,稍后再进行更新。
所有提交到 Onshape 应用商店供公众使用的应用程序都必须通过 OAuth2 正确进行身份验证。请参见“开发者文档:OAuth2”了解详细信息。
-
-
设置
-
支持协作 - 在开发应用程序时检查您是否希望与其他用户协作。
-
- 权限 - 请参阅下面的权限范围。
-
-
单击“创建应用程序。
-
从窗口复制 OAuth 密钥。
您将无法再次访问此密钥。此密钥对您和您的应用是唯一的。应像保护任何敏感密码一样保护此密钥,切勿将其提交到源代码中。
-
该应用的 OAuth 应用程序条目会显示,并激活“详细信息”页签。现在,在 OAuth 应用程序页签上选择该应用名称,即可进入此屏幕。
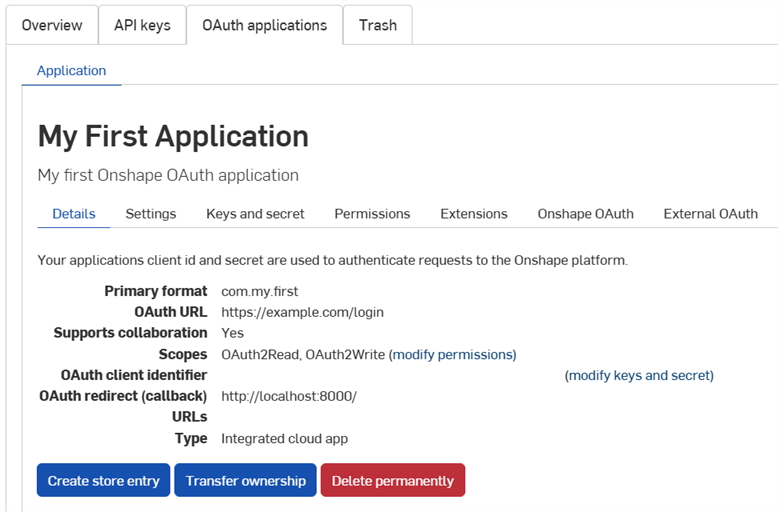
使用此屏幕上的页签可以:
-
详细信息:
-
设置:管理应用设置
- 密钥和秘密:
- 复制 OAuth 客户端标识符密钥
- 重生成新的 OAuth 客户端密钥
-
权限:修改应用权限范围
-
扩展:管理应用扩展程序
-
Onshape OAuth:管理 Onshape 身份验证
-
外部 OAuth:管理第三方身份验证
请参见“Onshape 开发者文档”了解更多信息,包括:使用 OAuth2 正确进行身份验证,以及完成启动检查清单。请参见“Hello World教程”了解有关可运行的示例。
创建扩展程序
-
单击开发者页面上的“OAuth 应用程序”页签,然后选择您的应用程序。
-
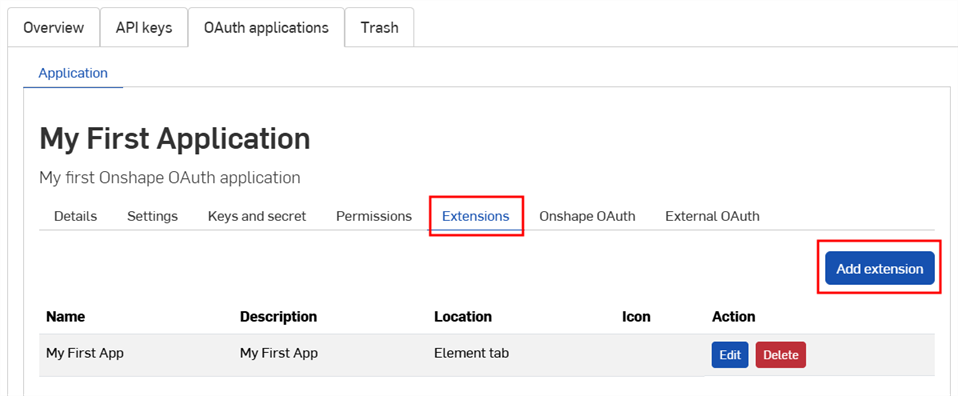
单击“扩展”页签。
-
单击“添加扩展”。
-
填写表单:
-
名称:如果在 UI 中过长,可能会被截断。
-
描述(可选):不会显示在 Onshape UI 中,但可能会出现在身份验证授权过程中。
-
位置:扩展程序在 Onshape UI 中的存在位置。
-
请参见开发者文档中的“支持位置和关联环境”。
-
每个应用程序只能创建一个元素页签扩展程序。
-
-
关联环境:某些位置仅在选择的关联环境内有效,例如在 Part Studio 内部。
-
请参见开发者文档中的“支持位置和关联环境”。
-
-
操作 URL:嵌入 UI 的位置使用操作 URL 来定义要显示的页面地址。如果位置是一个操作(环境菜单、工具栏项、对话中的操作等)且操作类型是 GET 或 POST,则操作 URL 用于指定 REST 端点。如果位置是一个操作,且该操作为“在新窗口中打开”,则操作 URL 为要在新窗口中打开的 URL。
-
请参见开发者文档中的“操作 URL 参数”了解可在此输入框中使用的参数列表。
-
-
操作类型:适用于不嵌入 UI 的位置。支持的操作类型有:
-
GET——使用操作 URL 发起 GET API 调用。操作 URL 上会进行参数替换。
-
POST——使用操作 URL 发起 POST API 调用,并将操作主体作为 POST 主体。操作 URL 和操作主体上都会进行参数替换。
-
在新窗口中打开——这会在新浏览器窗口中打开操作 URL。操作 URL 上会进行参数替换。
-
-
操作主体:仅适用于 POST 操作类型。操作主体在 POST API 调用中传递,且必须采用有效的 JSON 格式。
-
显示响应:仅适用于 GET 或 POST 操作类型。选中后,UI 会等待响应,并在 UI 的对话中显示该响应。响应必须采用有效的 JSON 格式。
-
图标:图标会显示在扩展程序所在的位置,可能包括信息面板中的图标、环境菜单操作、工具栏按钮、对话中的操作按钮或其他支持的位置。
-
-
单击确定。
有关创建和管理 Onshape 应用程序的更多信息,请参见“Onshape 开发者文档”。有关可运行的示例,请参见 Hello World 教程。
转让应用所有权
- 在您的“开发者设置”中,单击“OAuth 应用程序”。
- 单击要转让的应用程序的名称。
- 单击“详细信息”页签上的“转让所有权”按钮。“转让所有权”对话开启。
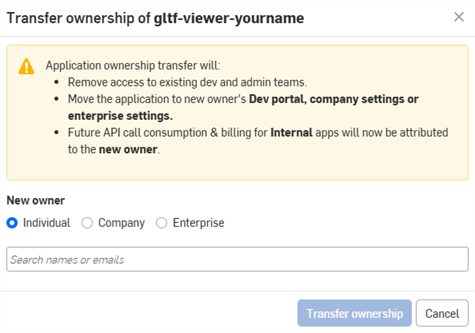
- 选择一个选项,将应用程序转让给个人、公司或企业。
- 要转让给个人,请在搜索输入框中输入新所有者的姓名或电子邮件。要将所有权转让给公司或企业,请从下拉列表中选择一个选项。
- 单击“转让所有权”。该应用程序会从您的 OAuth 应用程序列表中移除。
- 如果应用已转让给个人帐户,他们会收到电子邮件通知,并且该应用会出现在其“Onshape 开发者门户”中。
- 如果应用已转让到 Company/Classroom/Enterprise 中的某个人,则所有管理员都会收到电子邮件通知,并且该应用会出现在其“开发者设置”中。
未来的 API 调用消耗和计费将归属于新所有者。详细信息请参见“API 限制”。
弃用和删除应用
- 单击公司设置左侧窗格中的“开发者”,单击“OAuth 应用程序”,然后选择要弃用的应用。
- 单击“状态”按钮查看应用程序的当前状态和任何支持的状态更改。支持的状态包括:
- 活动——应用程序可在 Onshape 应用商店中获取。
- 已弃用——应用不再在应用商店中提供,但当前用户仍保留其访问权限。
- 已丢弃——应用已从“OAuth 应用程序”页签移除,并移至“垃圾桶”页签。
只有在所有付费订阅过期后,才允许丢弃。
所有购买记录和授权都会被清理。
- 已删除:应用程序已从垃圾桶中永久移除。此操作无法撤消。
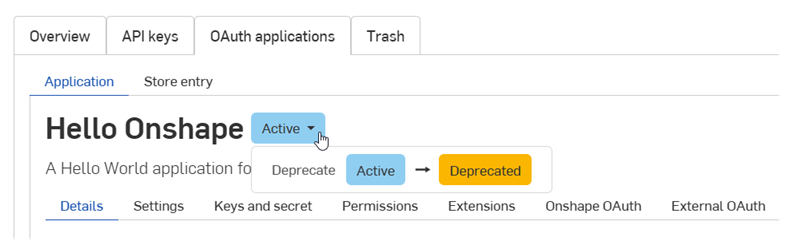
- 选择所需的状态更改。
- 输入应用的名称,然后再次单击以在对话中确认。
管理 Onshape 应用商店条目
在将应用提交到 Onshape 应用商店之前,请参见“Onshape 开发者文档”中的要求,包括使用 OAuth2 正确进行身份验证以及完成启动检查清单。
创建 Onshape 应用商店条目
要为 OAuth 应用程序创建新的商店条目,请执行以下操作:
-
单击开发者页面上的“OAuth 应用程序”,然后选择您的应用程序。
-
在应用的“详细信息”页签中,单击“创建商店条目”按钮。
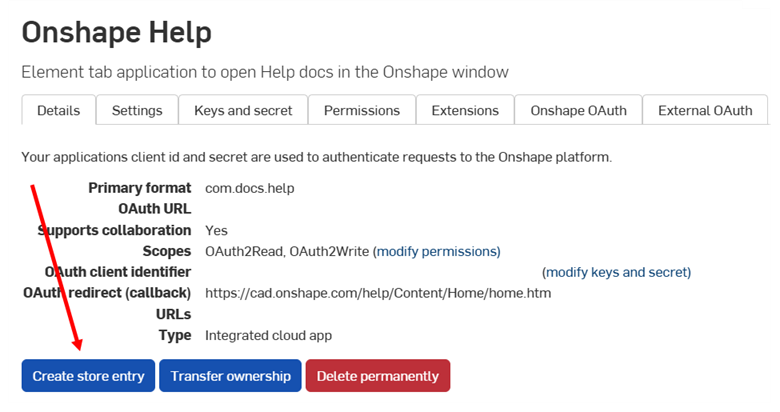
-
填写表单:
- 名称——根据注册时提供的应用名称自动设置。
-
摘要——根据注册时提供的摘要自动设置。
-
类型——应用程序类型:集成云应用、已连接云应用或已连接桌面应用。此类型应与注册 OAuth 应用程序时选择的类型相匹配。
-
类别——为您的应用选择适当的类别。
-
团队可见性——选择私有应用商店条目的可见范围:不对内部用户可见(默认)、对所有内部用户可见或仅对特定团队可见。
-
描述——面向用户的应用程序描述。允许使用有限的格式。
-
支持 URL——您的应用程序用户在寻求帮助时应被引导至的 URL 或电子邮件。该渠道必须被积极监控。
-
支持电子邮件——应接收应用订阅通知的电子邮件。该电子邮件必须被积极监控。
-
供应商——您的公司名称。
-
版本——此应用程序的当前版本。
-
图像——可选择上传摘要图、主视觉图及其他图像。
-
单击“创建”。
该应用程序会以私有状态显示在 Onshape 应用商店中。只有您以及在“团队可见性”设置中指定的任何内部团队才能看到它。要将应用设为公开,请参见下一节的“启动检查清单”。
要返回此屏幕,请单击应用程序的“商店条目”页签:
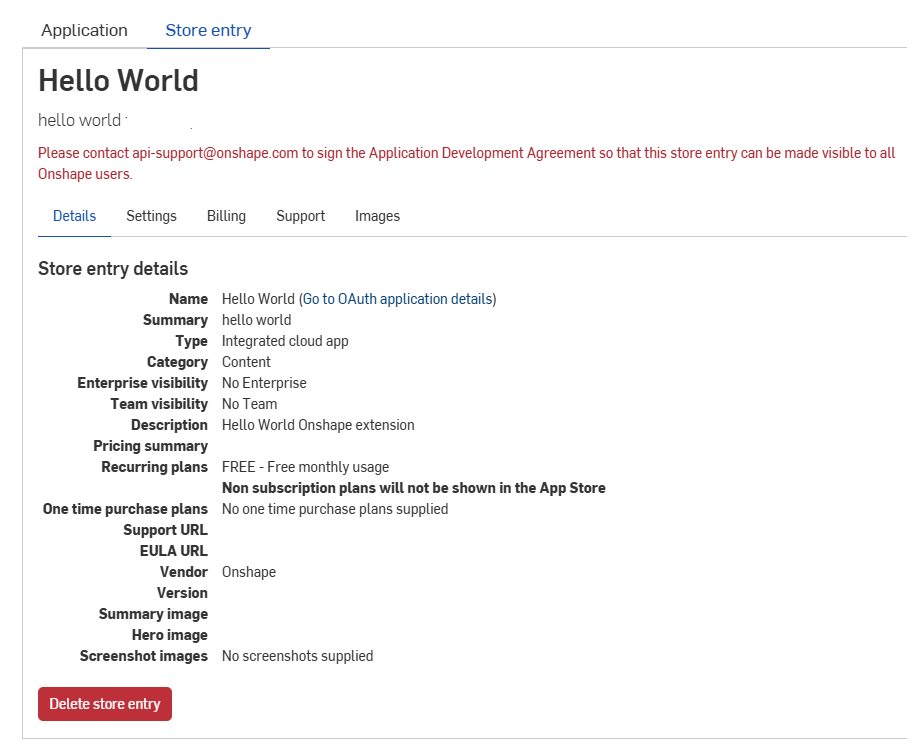
订阅您的 Onshape 应用
个人帐户用户可以在 Onshape 应用商店中订阅应用:
- 前往 Onshape 应用商店:https://cad.onshape.com/appstore
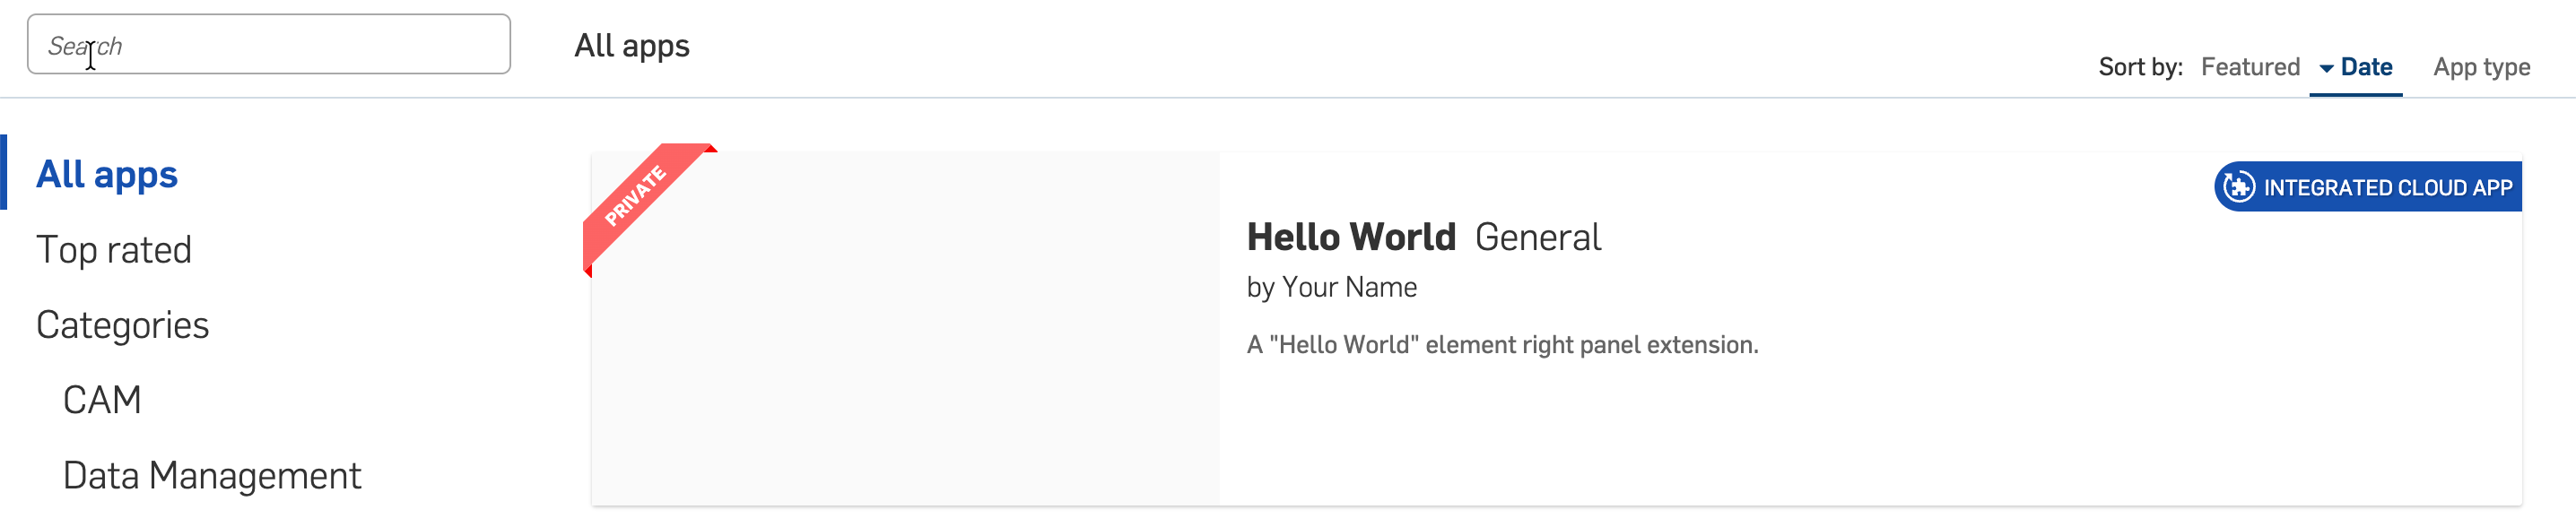
- 选择应用。该应用仍为私有状态,只有您作为创建者才能看到:
- 单击“订阅”:
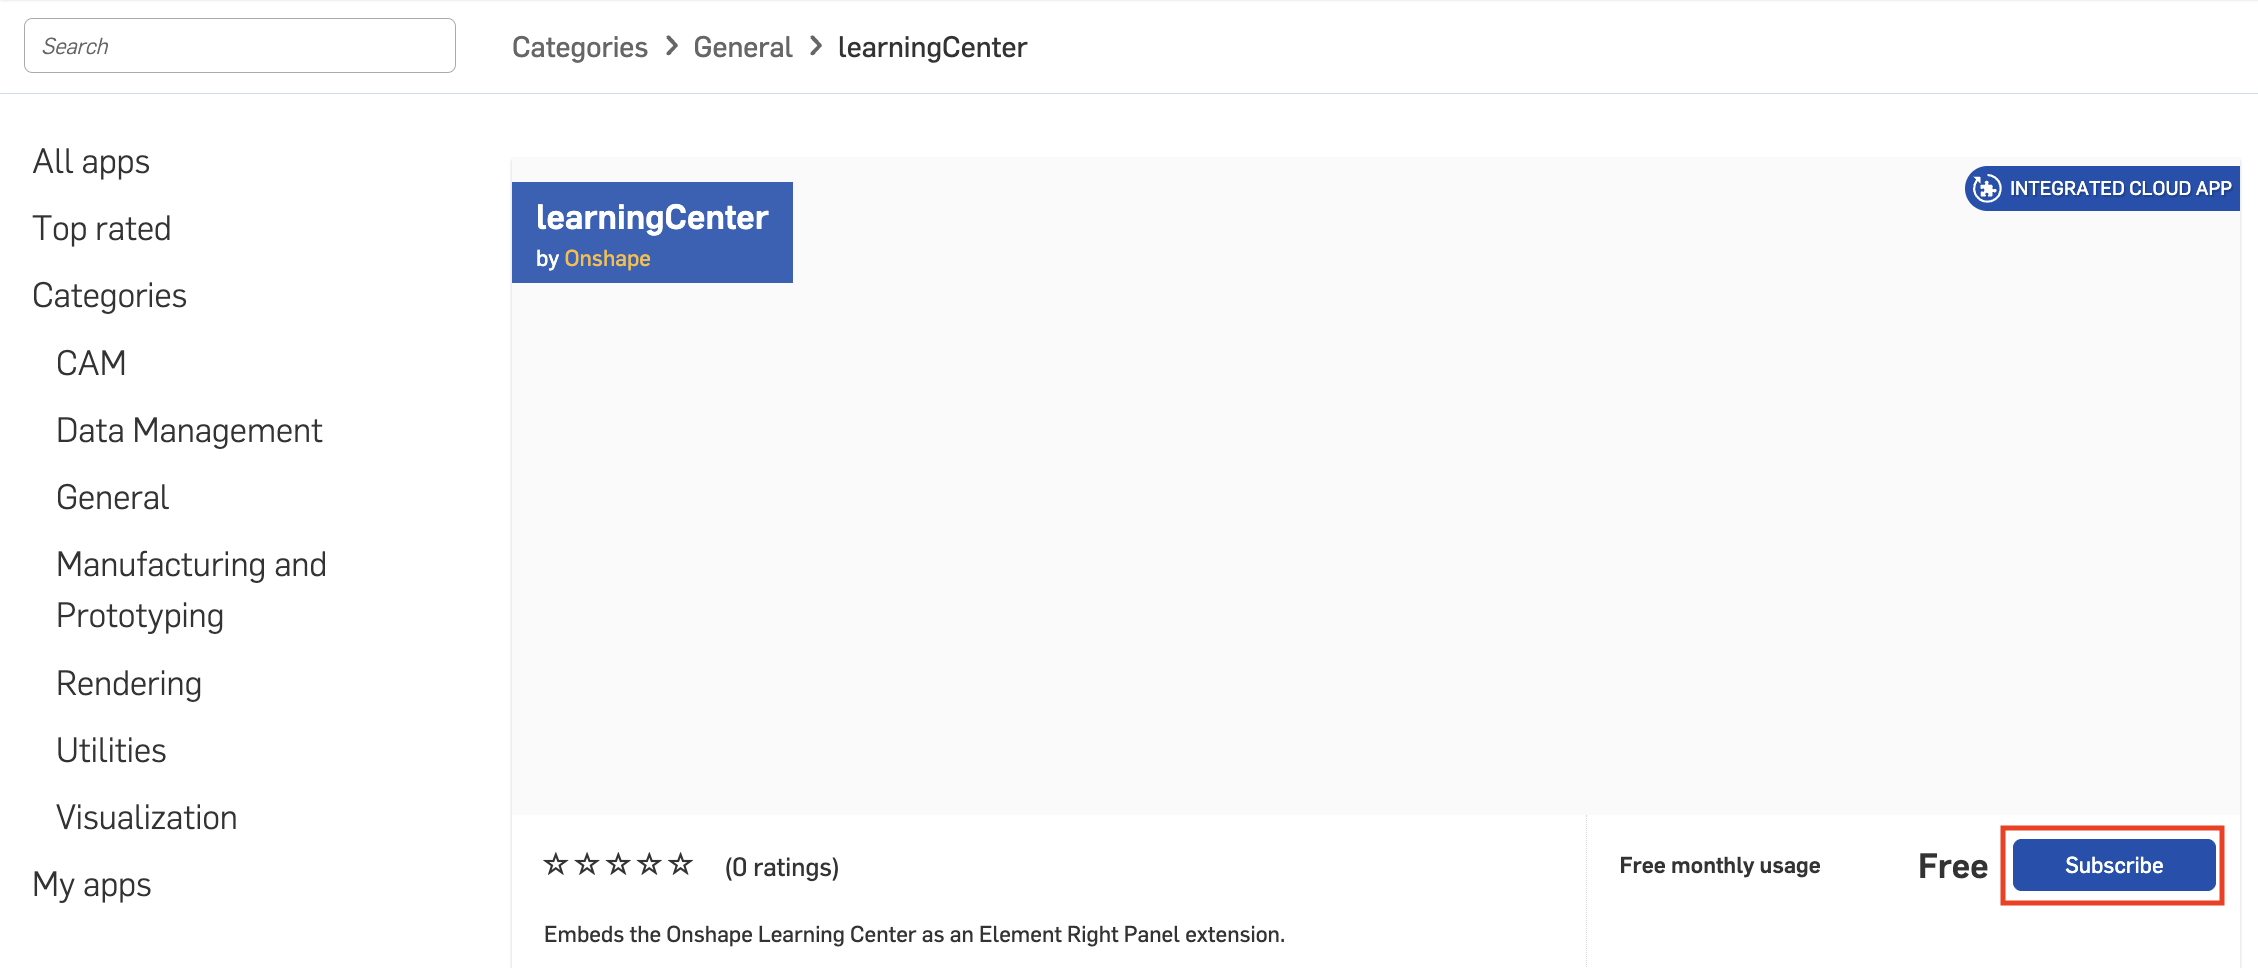
- 按照屏幕上的提示订阅该应用。
- 刷新您的 Onshape 浏览器窗口以测试应用扩展。
删除 Onshape 应用商店条目
- 单击开发者页面上的“OAuth 应用程序”,然后选择您的应用程序。
- 单击“商店条目”页签。
- 单击“详细信息”页签上的“删除商店条目”。
- 再次单击“删除”以确认。
权限范围
创建 OAuth 应用程序时可以使用以下权限范围:
-
应用程序可以读取您的配置文件信息 (OAuth2ReadPII) - 选中以允许应用程序访问您的配置文件中的信息。
-
应用程序可以读取您的文档 (OAuth2Read) - 选中以允许应用程序读取您的文档。
-
应用程序可以写入您的文档 (OAuth2Write) - 选中以允许应用程序对您的文档进行写入访问。
-
应用程序可以删除您的文档和工作区 (OAuth2Delete) - 选中以允许应用程序访问删除您的文档和工作区。
-
应用程序可以代表您请求购买 (OAuth2Purchase) - 勾选此项以允许应用程序为您进行购买。
-
应用程序可以代表您共享和取消共享文档 (OAuth2Share) - 选中此选项可允许应用程序共享和取消共享您的文档。