 폭 메이트
폭 메이트
![]()
![]()
![]()
최대 두 개의 탭을 메이트하여 두 개의 메이트 커넥터 사이에 대칭으로 구속합니다. 슬롯의 중심 평면에서는 선형 이동 및 수직 회전이 허용됩니다. 첫 번째 선택 영역은 중앙에 배치할 아이템을 정의합니다. 두 번째 선택 영역은 중심 평면을 정의합니다.
- Click the Width mate icon (
 ).
). 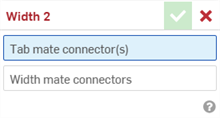
- With the Tab mate connector(s) field highlighted, select up to two mate connectors. These can be from the same or different parts.
- Select the Width mate connectors field to highlight it. Select the two mate connectors from the same or different parts. The Width mate connectors must be associated to a different part or parts than the Tab mate connectors.
- Click the checkmark (
 ) to accept the width mate.
The part(s) associated with the Tab mate connector(s) now translate along, and rotate about, a mirrored plane between the 2 Width mate connectors. The Tab mate connectors XY planes remain symmetric to each other across this mirrored plane. Similarly, the 2 Tab mate connectors XY planes remain symmetric to each other across this mirrored plane.
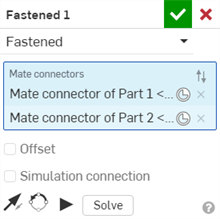
두 개의 명시적 메이트 커넥터 또는 암시적 메이트 커넥터 간에 메이트를 작성한 후에는 메이트 커넥터 중 하나를 편집할 수 있습니다.
-
메이트 대화상자를 엽니다. 아래 예제에서는 체결 메이트가 예로 사용되었습니다. 프로세스는 메이트 커넥터를 사용하지 않는 탄젠트 메이트를 제외하고 모든 메이트에서 비슷합니다.
-
메이트 커넥터 아이콘(
 )을 클릭합니다. 메이트 커넥터의 원점 유형, 원점 요소, 정렬, 위치, 주 축 방향 및 보조 축 방향을 편집할 수 있는 메이트 커넥터 대화상자가 열립니다.

메이트 대화상자에서 메이트 커넥터를 편집할 수 있는 작업은 현재 어셈블리에 있는 암시적 또는 명시적 커넥터로만 제한됩니다. Part Studio, 하위 어셈블리 또는 링크된 문서의 메이트 커넥터는 원래 위치에서 편집해야 합니다.
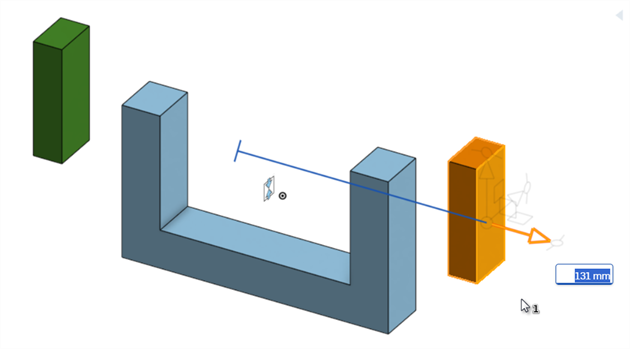
Keeping 1 part symmetrical between 2 Width mate connectors.
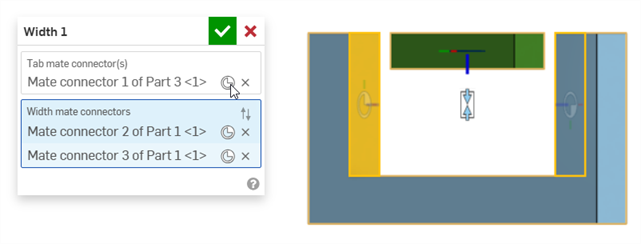
The green rectangle Part 3 has a mate connector placed in the middle of the part. The U-shaped blue Part 1 has Width mate connectors placed on its inside faces.
-
Part 3 is now symmetrical between the 2 Width mate connectors (the 2 inside faces of Part 1).
-
Part 3 can be translated or rotated freely along its Z axis. Translating or rotating Part 3 along the X or Y axes moves both parts.
Keeping Part 1 fixed limits the movement further. You can now translate Part 3 freely along the X and Z axes, but cannot translate it along the Y axis. You can rotate Part 3 along the Z axis, but cannot rotate it about the X or Y axes.
Keeping 2 parts symmetrical between 2 Width mate connectors
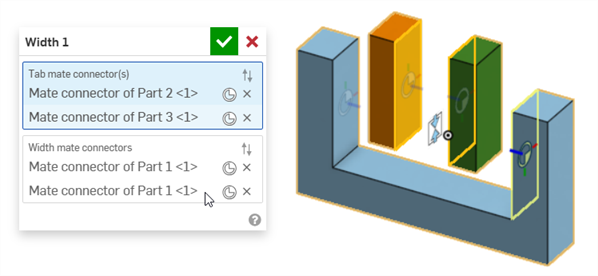
The orange rectangle Part 2 and green rectangle Part 3 have a mate connectors placed on their opposing inner faces. The U-shaped blue Part 1 has Width mate connectors placed on its inside faces.
When either Part 2 or Part 3 are translated along the Z axis, they remain symmetric to each other, and moving one will move the other:
Translating the orange rectangle Part 2 also translates the green rectangle Part 3, so they always remain symmetric, based on their mate connectors.
Using 2 Width mate connections to center entities in a u-joint
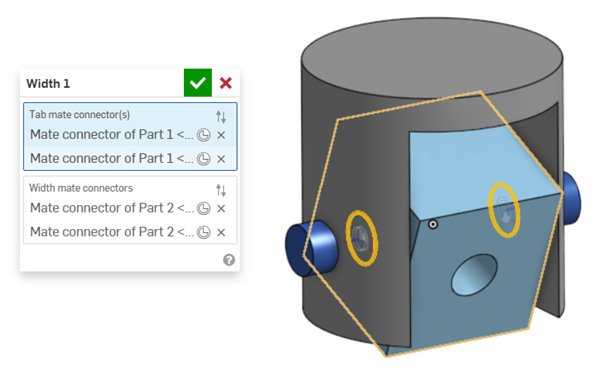
The following example uses 2 Width mates to center a box and pin in a u-joint.
The Width mate can be used to center the box in a u-joint, as shown below. Mate connectors are placed on both sides of the box (Part 1), which are designated as the Tab mate connectors. Mate connectors are placed on the 2 inner sides of the u-joint (Part 2), which are designated as the Width mate connectors:
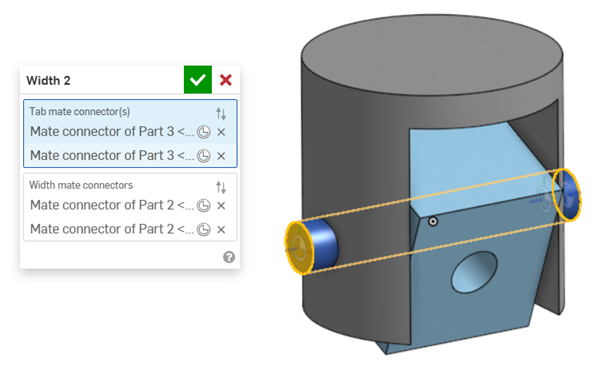
A second Width mate is used to center the box in a u-joint, Mate connectors are placed on both ends of the pin (Part 3), which are designated as the Tab mate connectors. The same 2 inner sides of the u-joint (Part 2) are designated as the Width mate connectors:
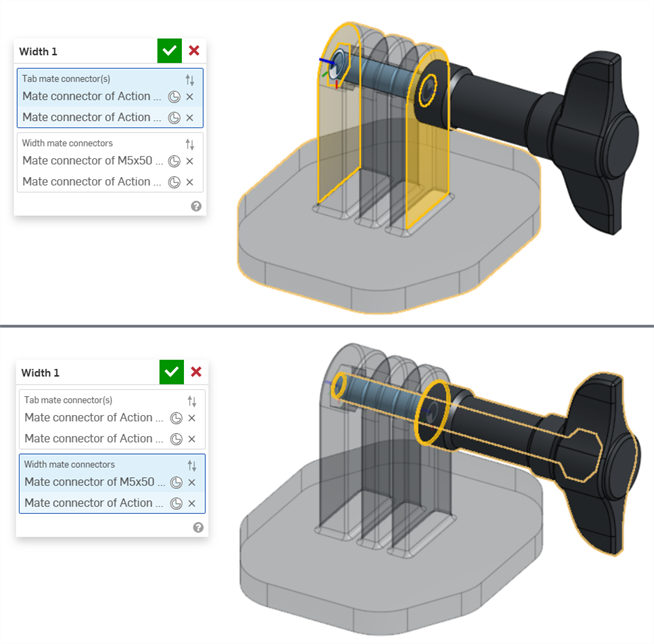
Centering a Jackhammer handle shaft between its end caps
The following example uses a Width mate to center a Jackhammer's handle shaft between its 2 handle grip end caps.
Mate connectors are placed on both ends of the shaft, which are designated as the Tab mate connectors. Mate connectors are placed on the 2 outer faces of the end caps, which are designated as the Width mate connectors:

Width mate used with an asymmetric part
The following example shows how you can use Width mate on an asymmetric part:
- A Tab mate connector and Width mate connector cannot be on the same part.
- Unlike other mates, it is possible to use 2 mate connectors on the same part for either the Tab mate connector(s) or Width mate connectors. However, this is not required.
- Both implicit and explicit mate connectors can be selected in the Width mate dialog.
- Width mates cannot be used with Mate relations.
- Click the Show Width mate from the Mate features list to display the mate in the graphics area.
iOS and Android support for the Width mate feature is limited to viewing and editing Width mates created from the desktop (browser) platform.