ClassLink와 통합
![]()
![]()
![]()
통합 프로세스를 시작하기 전에 Onshape 엔터프라이즈 계정 또는 시험 사용을 요청하여 승인을 받고, Onshape 엔터프라이즈 도메인 이름을 가지고 있어야 합니다.
엔터프라이즈 도메인 이름은 예를 들어 MyCompanyName.onshape.com이 될 수 있습니다.
한 번에 하나의 SSO 제공업체만 사용할 수 있습니다.
조직에 맞게 매개 변수 값을 사용자 지정하지 않으면 이 구성 프로세스가 실패할 수 있습니다. 사용자 지정 SSO ID 공급자(예: Okta, PingOne 또는 ClassLink) 대시보드를 사용하여 Onshape를 애플리케이션으로 추가하고 조직별 값을 기록할 수 있습니다. 다음 절차에는 해당 값이 필요합니다.
Onshape는 모든 발신 SAML 인증 요청에 서명합니다. ADFS가 들어오는 SAML 요청의 유효성을 검사하므로 ADFS 통합의 경우를 제외하고는 인증서(예: SAML 서명 인증서)를 업로드할 필요가 없습니다. 참고로 마이크로소프트는 최신 버전의 ADFS에서 Microsoft Entra ID로 마이그레이션할 것을 권장합니다. 자세한 내용은 ADFS 개요를 참조하십시오.
ClassLink SSO 계정에 Onshape를 추가하십시오.
-
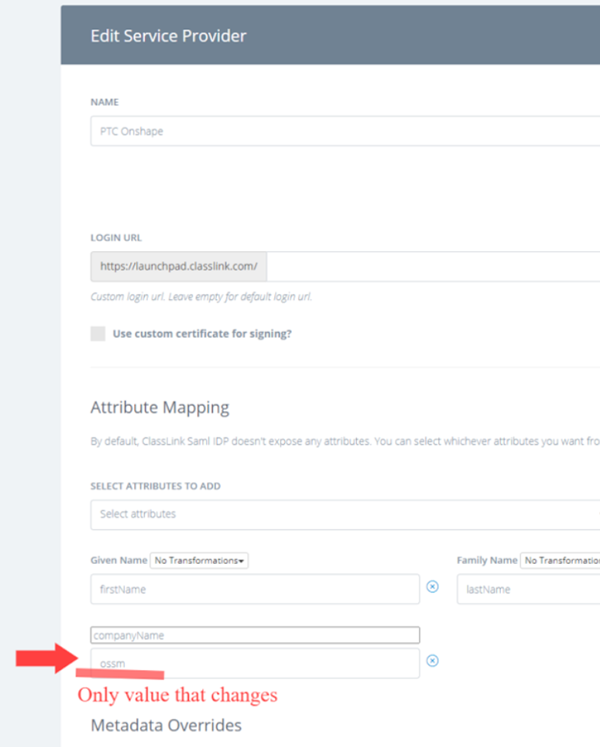
ClassLink SAML 콘솔로 이동하고 CompanyName 필드에 다음 값을 입력합니다:
-
메타데이터 URL 또는 텍스트 - 고객이 ClassLink IDP 메타데이터 URL을 제공해야 합니다.
-
로그인 URL - 로그인 URL의 상자에 지역 코드가 추가됩니다. 또는 기본 로그인 URL에 대해서 이 필드를 비워 두십시오.
-
ICON URL - 여기를 클릭하고 애플리케이션을 검색해서 마우스 오른쪽 버튼으로 클릭한 다음, 링크 주소를 복사해서 상자에 입력합니다(아래 참조).

-
특성 매핑 - 다음의 특성을 입력합니다.
-
지정된 이름을 선택하고 “firstName” 상자에서 이름을 변경합니다.
-
성을 선택하고 “lastName” 상자에서 이름을 변경합니다.
-
이메일을 선택하고 “email” 상자에서 이름을 변경합니다.
-
사용자 지정 특성을 선택하고 상자에서 “companyName”으로 이름을 변경합니다. 그런 다음, Comapny 이름을 추가합니다.
Comapny 이름은 에듀케이션 엔터프라이즈의 도메인 접두어와 동일합니다. 예를 들어, Onshape 엔터프라이즈 이름이 Fishbowl.onshape.com일 경우, 필드에 Fishbowl을 입력합니다.
-
-
메타데이터 재정의
-
필드에서 재정의할 NameId Format을 선택하고 emailAddress를 선택합니다.
-
필드에서 재정의할 Signature Algorithm을 선택하고 RSA_SHA256을 선택합니다.
-
필드에서 재정의할 NameId Value를 선택하고 Email을 선택합니다.
-
필드에서 재정의할 Saml NotBefore를 선택하고 3을 추가합니다.
-
-
업데이트 후 저장합니다.
IDP 시작 로그인 URL을 선택하고 복사해서 앱을 로컬 라이브러리에 추가합니다.

Onshape에는 클래스링크가 포함된 SSO용 메타데이터 구성 파일이 필요합니다.다음 단계를 완료하는 데 필요한 메타데이터 파일을 구하여 다운로드하려면 ClassLink에 문의하십시오.
Onshape에서 SSO 제공업체 구성
Onshape가 ID 제공업체에서 구성되고 ID 제공업체의 메타데이터 파일(Onshape에서는 구성 파일이라고 함)을 다운로드하면 Onshape에서 SSO 제공업체를 구성할 수 있습니다.
아래 예제 이미지는 구성 중인 일반 ID 제공업체를 보여 주지만 단계는 모든 ID 제공업체에 대해 동일합니다.
- 특수 도메인 이름을 관리자로 사용하여 Onshape 엔터프라이즈 계정에 로그인합니다. 계정에서 엔터프라이즈 설정을 선택합니다.

- 왼쪽 탐색 메뉴에서 인증을 선택합니다.
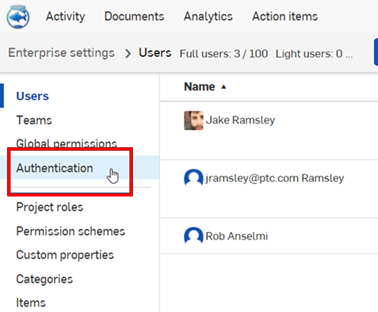
-
싱글 사인온(SSO) 하위 섹션에서 SSO 공급자 구성 버튼을 클릭합니다.
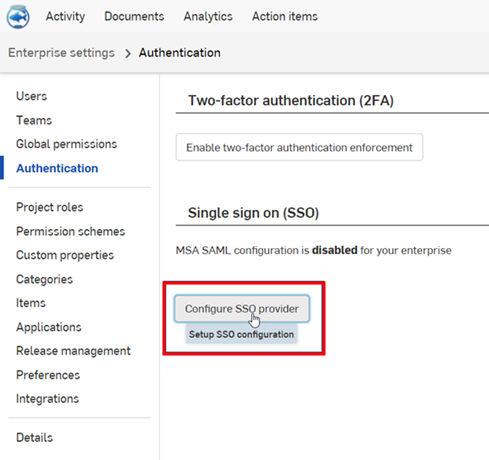
-
SSO 제공업체 생성 대화상자가 열립니다.
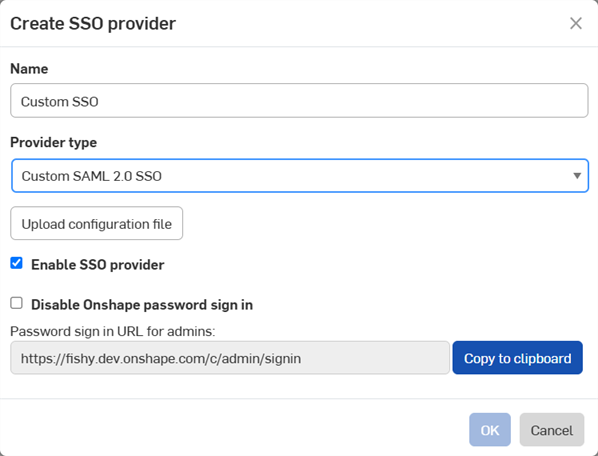
-
이름 필드에 사용자 지정 SSO와 같은 이름을 입력합니다.
-
제공업체 유형 드롭다운의 목록에서 SSO 제공업체를 선택합니다.
-
SSO 제공업체 활성화를 선택한 상태로 둡니다.
-
지금은 Onshape 비밀번호 로그인 비활성화가 선택되지 않은 상태로 둡니다.
Onshape 비밀번호 로그인 비활성화를 선택하면 본인과 사용자의 일반적인 Onshape 비밀번호 로그인이 비활성화됩니다. Onshape URL에는 SSO 제공업체 로그인 프롬프트만 표시됩니다. 이 옵션을 선택하기 전에 Onshape에 관리자 권한으로 직접 로그인할 수 있는지 확인합니다. 나중에 SSO 제공업체를 통한 로그인이 정상적으로 작동하는지 확인한 후 다시 여기로 돌아와 활성화할 수 있습니다.
SSO를 통해 Onshape 로그인을 실시하도록 선택하면 사용자가 cad.onshape.com과 같이 엔터프라이즈 이외의 도메인에서 직접 로그인할 수 없게 됩니다.
-
구성 파일 업로드 버튼을 클릭합니다.
-
-
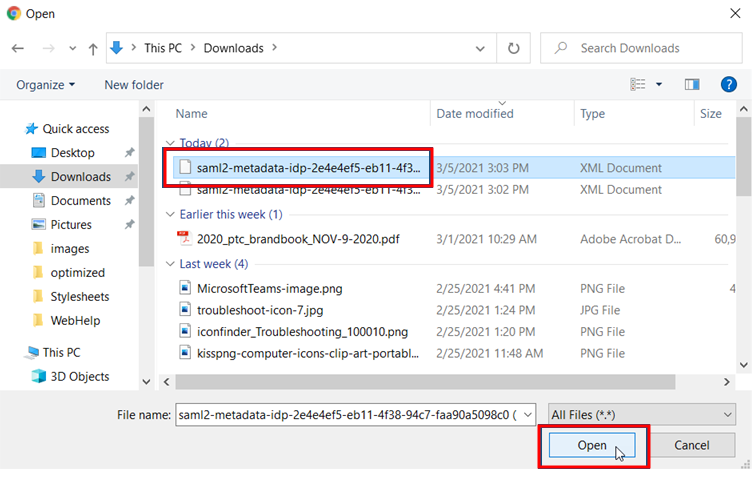
이전에 다운로드한 메타데이터 구성 파일을 찾아 선택하고 열기를 클릭합니다.
-
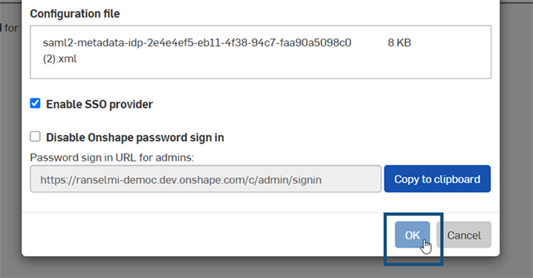
확인을 클릭합니다.
-
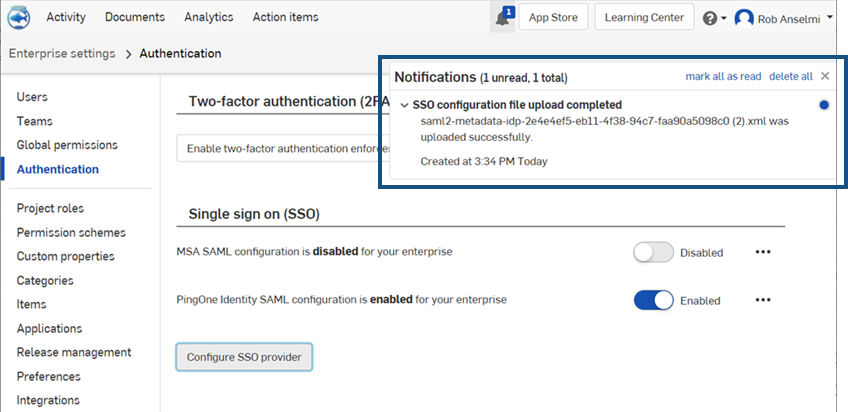
파일이 업로드됩니다. 업로드가 완료되면 알림이 나타납니다.
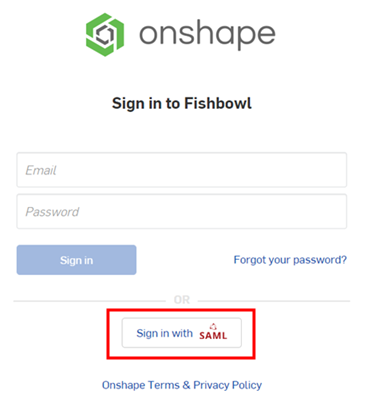
- Onshape 및 SSO 제공업체 계정 모두에서 로그아웃합니다. 두 계정을 모두 새로 고침합니다. Onshape 로그인 페이지에 다시 접속하면 페이지 하단에 SSO 제공업체용 로그인 링크가 새로 표시됩니다.
Onshape에 로그인하려면 사용자가 Onshape 애플리케이션을 사용할 수 있도록 관리자가 사용자를 (SSO 계정에서) 프로비저닝해야 합니다.