![]()
[アクションアイテム] タブで、リリースおよびタスクアクティビティのリストを表示して絞り込みます。
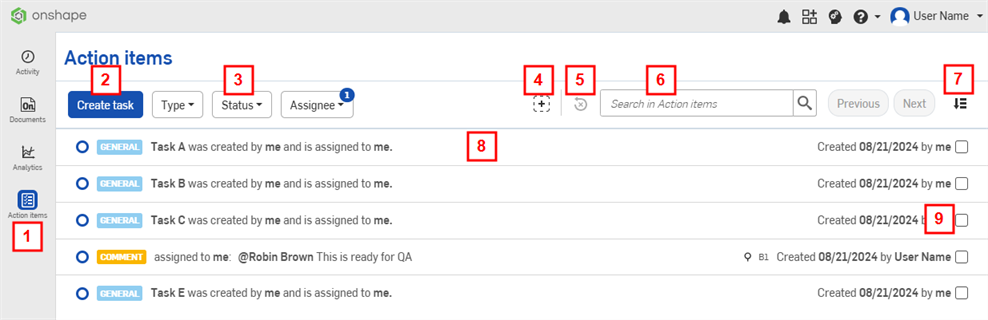
- アクションアイテム - [アクティビティ]、[ドキュメント]、または [アナリティクス] ページから [アクションアイテム] ページに戻るには、ページの上部にある [アクションアイテム] をクリックします。
- タスクを作成 - 一般タスクの作成を参照してください。
- フィルター - リリース、コメント、タスクを絞り込みます。フィルターオプションには以下が含まれます。
- タイプ - フィルターオプションの左側にあるチェックボックスを選択して、コメント、一般、リリースアクティビティを自由に組み合わせて絞り込めます。
- ステータス - フィルターオプションの左側にあるラジオボタンのいずれかを選択し、[任意]、[オープン]、[下書き]、[完了] のいずれかのステータスでタスクを絞り込めます。
- 割り当て先 - フィルターオプションの左側にあるラジオボタンのいずれかを選択して、自分に割り当てられたタスク、自分で作成したタスク、または任意のロールでタスクを絞り込みます。
- フィルターを追加 - ドロップダウンから追加のフィルターを選択して、アクションアイテムページに追加します。
- すべてのフィルターをクリア - すべてのフィルターを削除すると、すべてのアクションアイテムが表示されます。
- 検索 - 検索文字列に一致するタスク、コメント、またはリリースを絞り込みます。
- 並べ替え - [並べ替え] の下のドロップダウン矢印をクリックし、基本設定を選択して、絞り込んだ結果を、古いタスクの順、または新しいタスクの順で並べ替えます (Onshape の既定では古い順に並べ替えられます)。
- アクションアイテムリスト - さまざまなフィルターを選択すると、対応する選択の結果がページの中央にある [アクションアイテム] リストに表示されます。
- 解決 - タスクまたはコメントのチェックボックスをオンにして解決します。
一般タスクの作成
-
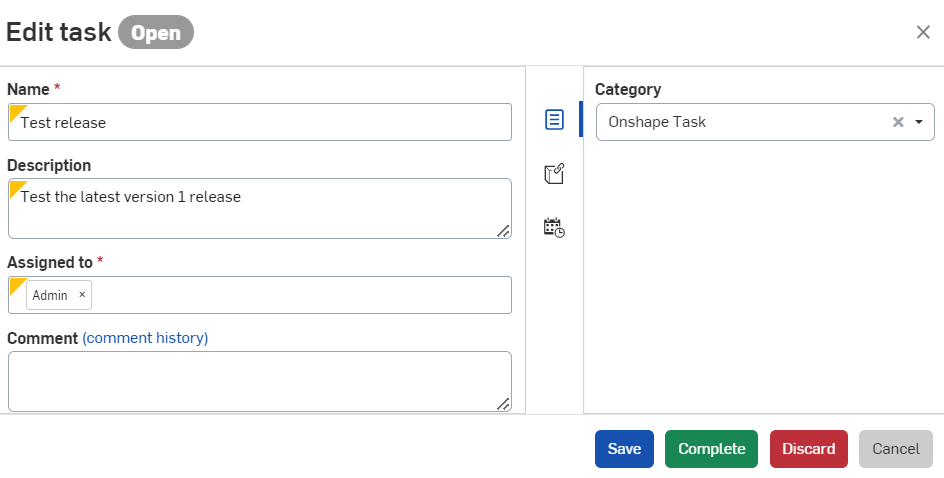
[タスクを作成] をクリックします。
![[タスクを作成] ダイアログ](Resources/Images/enterprise/action-item-03.png)
-
タスク名を指定し、オプションでタスクの説明を指定します。
-
タスクを誰かに割り当てます。タスクは次に割り当てられます:
-
ダイアログの右側の [プロパティ] アイコン (
 ) の横で、タスクの既定のカテゴリが割り当てられます。このカテゴリはそのままにしておくことも、削除することも、別のカテゴリを入力することもできます。
 -
[参照] アイコン (
 ) をクリックして、このタスクを特定のドキュメントまたはドキュメントのバージョン内のパーツ、アセンブリ、図面、ファイル、Feature Studio、またはアプリケーションに関連付けます。[参照] ダイアログが開いたら、[参照を追加] アイコン (
 ) をクリックし、参照を検索するか、特定の参照に URL を貼り付けるか、リストから選択して、パーツ、アセンブリ、図面、ファイル、Feature Studio、またはアプリケーションの特定のドキュメント内の参照を検索します。バージョンを作成したり、バージョングラフを表示したりすることもできます。
 -
[優先度と日付] アイコン (
 ) をクリックし、期日を入力します。
 -
タスクを保存して後で割り当てるには [保存] をクリックします。今すぐ特定のユーザーに割り当てるには [割り当て] をクリックします。タスクの作成を中止するには [キャンセル] をクリックします。
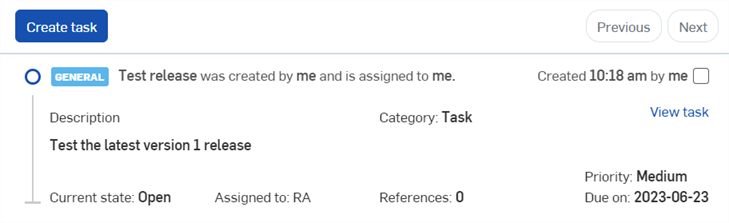
アクションアイテムリストの作成後に表示されるタスクの例。
-
タスクを作成した後で別のユーザーにタスクを割り当て直すには、[タスクを表示] を選択して編集します。[割り当て先] フィールドのユーザーを削除し、別のユーザーを選択します。[保存] をクリックしてタスクを割り当て直します。
タスク説明への URL の追加
タスク説明内の URL の場所は、タスクが保存されると自動的に HTML リンクに変換されます。
このリンクが、このドキュメント内または別のドキュメント内の Onshape の場所をターゲットとしている場合は、新しいブラウザタブで開きます。リンクの前に Onshape ロゴが表示され、ドキュメント、バージョン、ワークスペース、タブを表示する読みやすいテキストに変換されます。
リンクが Onshape の外部にある場合は、新しいブラウザタブで開きます。リンクには、外部リンクアイコンが付き、ターゲットの場所が Onshape の外側にあることを示す警告メッセージが表示されます (以下を参照)。
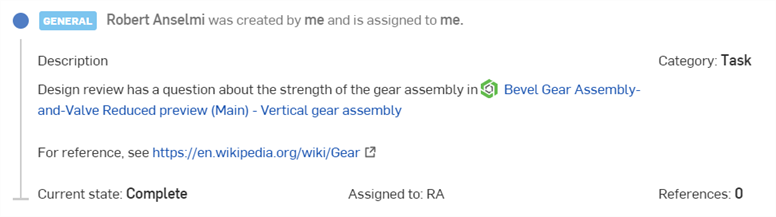
内部の Onshape リンク (上) と外部リンク (下)。
ユーザーは、外部リンクがセキュリティリスクをもたらす可能性があることに注意する必要があります。最初に検証したソースのリンクのみをクリックしてください。
フィーチャーリスト内のエンティティへのタグ付け (フィーチャーへのコメントの追加)
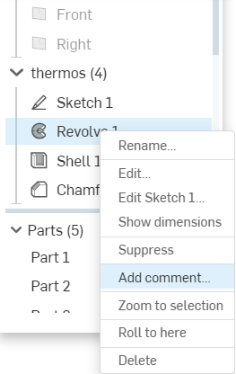
フィーチャーリスト (Part Studio および アセンブリ内) のエンティティにコメントを追加するには、リストでフィーチャーを選択し、コンテキストメニューにアクセスします。[コメントを追加] を選択します。
または、[ドキュメント] パネルで [コメント] ダイアログの [タグ] エンティティアイコンを使用できます。下図では、このアイコンは青で示されています。
![青で示された [タグ] エンティティアイコンを持つ [コメント] フライアウト](Resources/Images/comments/comment-flyout-tag-outlined.png)
次に、パーツ、エッジ、面などのエンティティ を選択します。
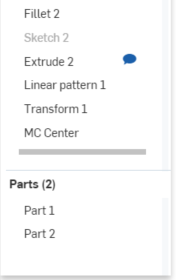
「@」記号を使用して、特定のユーザーがコメントに誘導するメールを受信するように指定します。[コメント] ダイアログ (上記) で [追加] をクリックすると、リスト (下記) またはグラフィック領域のエンティティの隣に [コメント] アイコン  が表示されます。
![]()
[コメント] パネルを閉じると、フィーチャーリストのコメントアイコンが消えます。アイコンは [コメント] パネルが開いている間のみ表示されます。
フィーチャーリストのフィーチャーには、グラフィック領域にコメントアイコンが表示されません。フィーチャーリストには、コメントアイコンが表示されます。
暗黙的な合致コネクタへのコメントの追加
暗黙的な合致コネクタにコメントを直接添付できます。
- カーソルを重ねて暗黙的な合致コネクタをアクティブにし、右クリックしてコンテキストメニューにアクセスします。
- [コメントを追加] を選択して、コメントフライアウトで新しいコメントを開きます。
[追加] をクリックすると、コメントパネルが開き、暗黙的な合致コネクタにコメントアイコンが表示されます:

[コメント] パネルを閉じると、グラフィック領域のコメントアイコンが消えます。アイコンは、[ドキュメント] パネルで [コメント] が開いている場合にのみ表示されます。
コメントを削除するには、[コメント] パネルの右上隅にある ![]() をクリックし、アクションを確認します。
をクリックし、アクションを確認します。
アクションアイテムリストの操作
アクションアイテムのリストには、次のように、交流して情報を取得するための多くのツールがあります。
- 各アイテムの箇条書き点: オープン (白抜き) の箇条書き点は、展開したことがないタスクを示します。閉じている箇条書き点 (青) は、以前に展開したことのあるアイテムを示します。
- アイテムをクリックして拡張します:
![[アクションアイテム] リストの展開されたアイテムの例](Resources/Images/enterprise/action-items.png)
アクションアイテムに関連付けられたドキュメントの名前が、ドキュメントサムネイルとともに表示されます。ドキュメントの名前をクリックして開きます。
リリースのタスクの場合、リリースの注記が含まれ、最後のコメントが作成され、アクションがこのワークフローの通知と関連付けられます。リリースの現在の状態についても、承認者の名前と、そのアクションの色分けされた表示とともに注記されます。拒否または廃棄された場合は赤、保留中の場合は白、承認された場合は緑です。
リリースを見るためのリンク (リリースを表示) もあります。これで、ドキュメントは開きませんが、[リリースをレビュー] ダイアログが開きます。