Intégration à ClassLink
![]()
![]()
![]()
Before starting the integration process, you must have requested, and been approved for, an Onshape Enterprise account or trial, and have an Onshape Enterprise domain name.
An example of an Enterprise domain name might be: MyCompanyName.onshape.com.
Note that you are only able to use one SSO provider at a time.
This configuration process might fail without parameter values customized for your organization. Use your custom SSO identity provider (for example: Okta, PingOne, or ClassLink) dashboard to add Onshape as an application and record the values that are specific for your organization. You need those values for the following procedure.
Onshape signe toutes les demandes de certification SAML sortantes. Vous n'êtes pas obligé de télécharger des certificats (par exemple, un certificat de signature SAML), sauf dans le cas d'une intégration ADFS, car ADFS valide les demandes SAML entrantes. Notez que Microsoft recommande de migrer de la dernière version d'ADFS vers Microsoft Entra ID. Consultez la Vue d'ensemble d'ADFS pour plus d'informations.
Ajouter Onshape à votre compte d'authentification unique ClassLink
-
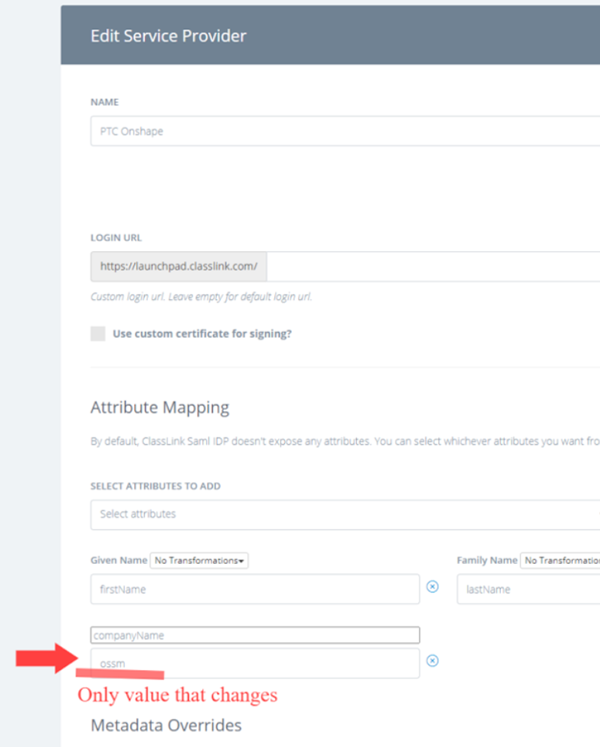
Accédez à la console ClassLink SAML et entrez la valeur suivante dans le champ CompanyName :
-
URL ou texte de métadonnées - Le client doit fournir une URL de métadonnées ClassLink IDP.
-
URL de connexion - Le code de district est ajouté dans la case pour l'URL de connexion ou laissez ce champ vide pour l'URL de connexion par défaut
-
URL DE L'ICÔNE - Cliquez ici, recherchez l'application, cliquez avec le bouton droit, puis copiez l'adresse du lien pour la saisir dans la zone (ci-dessous).

-
Mappage d'attributs - Entrez les attributs suivants :
-
Sélectionnez Prénom et renommez dans la case « firstName »
-
Sélectionnez Nom de famille et renommez dans la case « lastName »
-
Sélectionnez Email et renommez dans la case « e-mail »
-
Sélectionnez Attribut personnalisé et renommez en « CompanyName ». Saisissez ensuite le nom de votre société.
Le nom de la société est le même que le préfixe de domaine d'une entreprise. Par exemple, si votre nom d'entreprise Onshape est FishBowl.onShape.com, entrez Fishbowl dans le champ.
-
-
Remplacements de métadonnées
-
Sélectionnez NameId Format dans les champs à remplacer et sélectionnez emailAddress
-
Sélectionnez Signature Algorithm dans les champs à remplacer et sélectionnez RSA_SHA256
-
Sélectionnez la NameId Value dans les champs à remplacer et sélectionnez Email
-
Sélectionnez Saml NotBefore dans les champs à remplacer et ajoutez 3
-
-
Mettez à jour pour enregistrer.
Sélectionnez et copiez l'URL de connexion de l'IDP initiate pour ajouter l'application dans la bibliothèque locale.

Onshape nécessite un fichier de configuration de métadonnées pour le SSO avec Classlink. Consultez ClassLink pour obtenir et télécharger le fichier de métadonnées nécessaire pour effectuer les étapes suivantes.
Configure the SSO Provider in Onshape
Once Onshape is configured in the identity provider and you have downloaded the identity provider's metadata file (referred to in Onshape as the configuration file), the SSO provider can be configured in Onshape.
The example images below shows a generic identity provider being configured, but the steps are the same for all identity providers.
- Sign in to your Onshape Enterprise account, using your specialized domain name, as an administrator. Select Enterprise settings from your account:

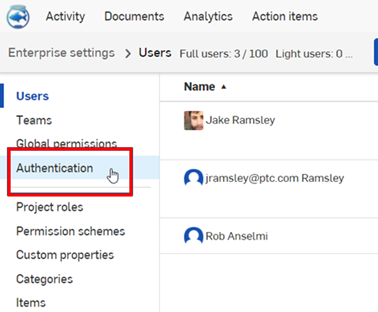
- Select Authentication from the left navigation menu:
-
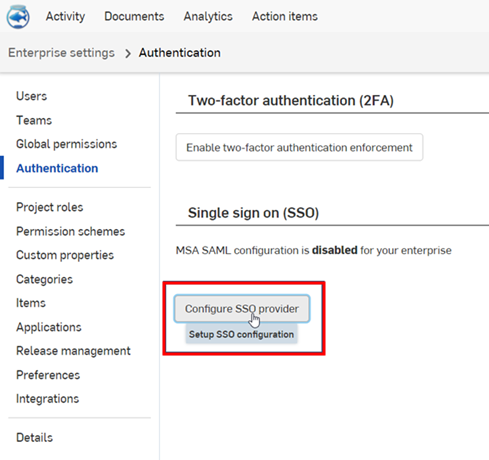
In the Single sign-on (SSO) subsection, click the Configure SSO provider button:
-
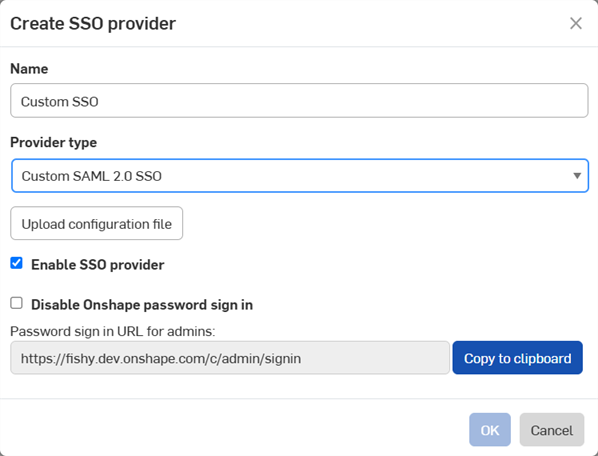
The Create SSO provider dialog opens:
-
In the Name field, enter name, such as Custom SSO
-
In the Provider type dropdown, select your SSO provider from the list.
-
Leave Enable SSO provider checked.
-
Leave Disable Onshape password sign in unchecked for the moment.
Disable Onshape password sign in disables the typical Onshape password sign in for you and your users. Only the SSO provider sign in prompt is displayed for the Onshape URL. Before checking this option, ensure you can sign in to Onshape yourself (as administrator). You can return here later and enable it once sign in through your SSO provider is verified to work correctly.
Choosing to enforce signing in to Onshape via SSO also results in users not being able to sign in to non-enterprise domains directly, such as cad.onshape.com.
-
Click the Upload configuration file button:
-
-
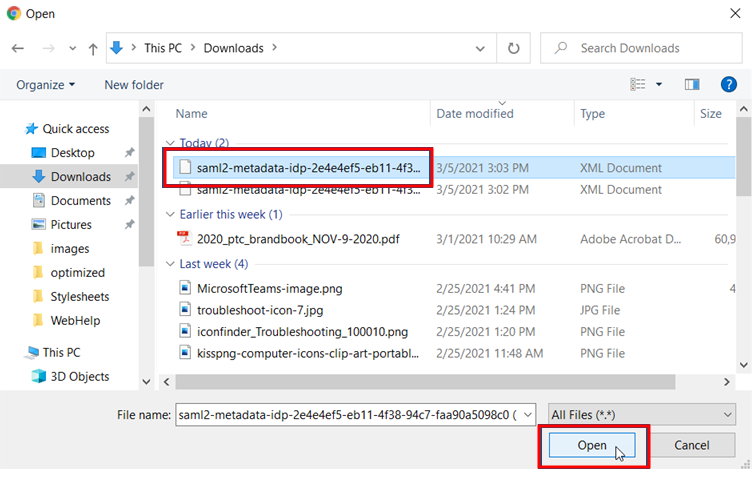
Locate and select the metadata configuration file you downloaded previously, and click Open:
-
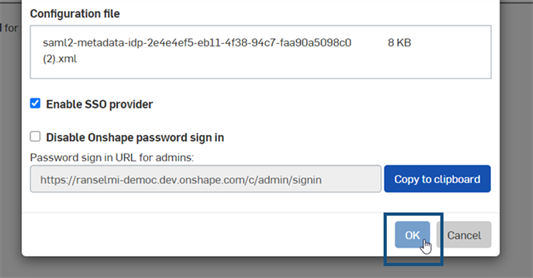
Click OK:
-
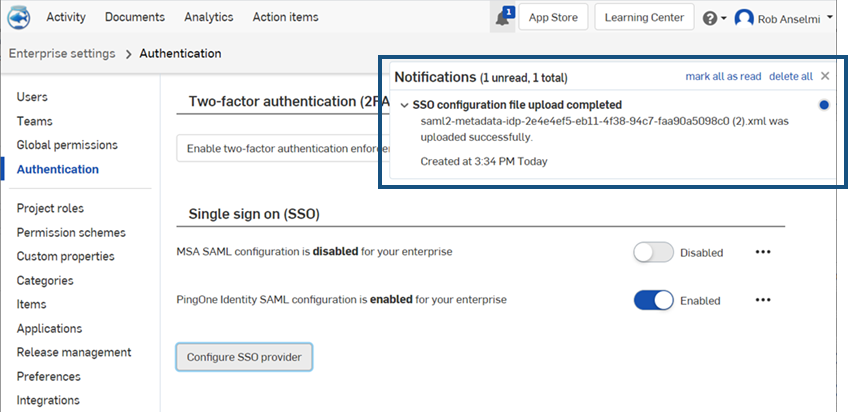
The file is uploaded. A notification appears when the upload is completed:
- Sign out of both your Onshape and SSO provider accounts. Be sure to do a hard refresh of both accounts. When you reach the Onshape sign-in page once again, the page has a new Sign in link at the bottom, for your SSO provider.
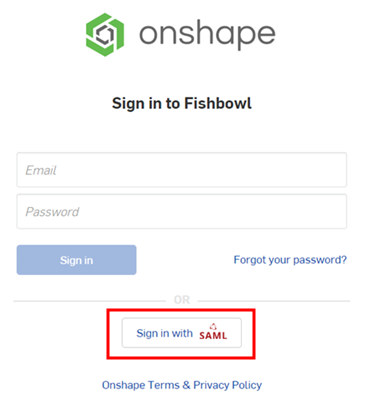
In order to sign in to Onshape, administrators must provision their users (in their single sign on account) to use the Onshape application.