 Insérez image


Disponible dans : Esquisse
Use an imported image as a basis for a sketch. Insert an image from the currently active document, other documents, or an image library into your document, then open that image in a sketch. Create sketch geometry using the image as a guide. Supported image types include: PNG, JPEG, GIF, and BMP.
 Étapes
- Click
 to open the Insert image dialog: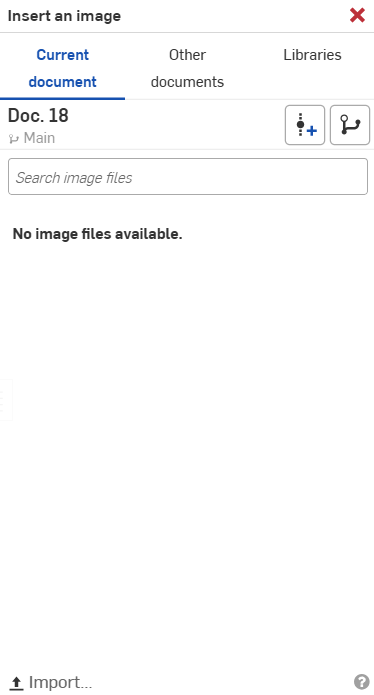
- Choose to insert an image from the current document, other documents, or from an image library. If there are no image files listed, use the Import link at the bottom of the dialog.
Current document - Select an image (or use the Search bar to find one) from the currently active document. You can also Create a version or view the Version graph of the document.
Other documents - Select an image (or use the Search bar to find one) from other documents in your company.
Libraries - Select an image (or use the Search bar to find one) from an image library. Select a library from the dropdown menu, then select an image.
- Click Done at the bottom of the dialog box, then click and drag in the graphics area to position the image. The aspect ratio of the image is maintained and indicated by a dashed line as you drag.
A horizontal constraint is applied to the lower edge of the box by default.
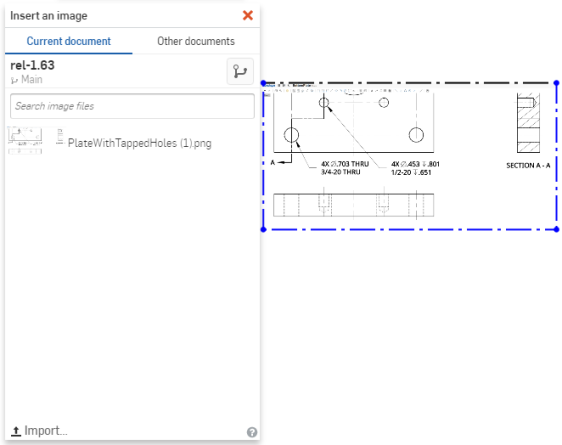
The image becomes semi-transparent as you move it, for better visibility during placement.
To rotate the image, first delete the horizontal constraint applied by default, then fix one corner of the image and drag another.
Vous pouvez effectuer une esquisse au-dessus de l'image. La cotation de la géométrie d'esquisse a également pour effet de mettre à l'échelle l'image.
Image libraries
Image libraries are special folders that contain images. Each company can have one image library that is owned by an administrator (with given share permissions for the company). Additionally, individuals can each set up one image library for their own personal use, with no special permissions required.
Creating an image library
Image libraries are created and stored in Onshape folders. From the Documents page:
-
Create a folder. (Company libraries must be created in the root folder.)
-
Right-click on the folder in the Projects and Folders list and hover over Set library in the context menu to access the extended menu options.
-
From the extended menu options, click My images. This sets the folder as your image library.
Once the folder is set as your image library, right-click on the folder and hover over the Image library option to access the following additional context menu options:
-
Update my library - Update your image library. (Useful when changes are made to a document inside the image library.)
-
Unset my library - Unset the selected folder as your image library. (This removes the folder's designation as the user/company library without deleting the folder or its content.)
-
Set as <company> library - Set the selected folder as your company-wide image library.
Formats de fichiers supportés
-
JPEG
-
PNG
-
GIF
-
BMP
Remarques
- La taille d'image maximale dépend du GPU de votre appareil, qui peut être vérifié sur https://webglreport.com. Assurez-vous que la largeur et la hauteur de l'image sont égales ou inférieures à la limite de pixels de la taille maximale de la texture.
- Pour faire pivoter une image, supprimez la contrainte horizontale, fixez un coin et faites glisser un autre coin.
- Pour déplacer une image, supprimez toutes les contraintes et cliquez et faites glisser l'image vers l'emplacement souhaité.
- Vous pouvez esquisser par-dessus l'image.
- La cotation de la géométrie d'esquisse met également l'image à l'échelle, mais seule la première cote appliquée met l'image à l'échelle. Pour redimensionner l'image, supprimez les cotes supplémentaires et ajustez la cote restante.
- Lorsque vous affichez/masquez l'esquisse, l'image est également affichée ou masquée.
- Cette fonction respecte le canal alpha, donc si elle est transparente, elle restera ainsi dans Onshape.
- Vous pouvez copier/coller une image (en tant qu'entité d'esquisse) dans un Atelier des pièces et d'un Atelier des pièces à un autre.
- Vous pouvez utiliser le menu contextuel et la commande Modifier l'image pour sélectionner un autre fichier d'image ou en charger un nouveau.
- Si la source de l'image change, elle peut être mise à jour dans son onglet à l'aide de l'option Mettre à jour dans le menu contextuel de l'onglet. Cela met également à jour l'image partout où elle est utilisée dans le document.
See the Learning center course Introduction to Sketching (Onshape account required) for more information.